Intermediate guide
You've already built the starter jar: a scoop of potting soil, a pinch of yard moss, maybe a tiny plastic frog, and a lid that turned the whole thing into a swamp within a week. That's not a failure — that's the first real lesson in terrarium building, which is that a sealed jar is less a garden than a weather system you're responsible for. The intermediate tier starts when you stop decorating and start engineering: you build for the water cycle first and the looks second, you sterilize your substrate before a single root touches it, and you plan for trimming seasons in a world where a fittonia can outgrow a gallon jar by spring. Get those three right and the payoff is the famous one — a green glass world that waters itself and hums along for years with a mist every month or two.
The beginner tier opens a mason jar; the intermediate tier makes a decision about what kind of system you're building. Closed terrariums — sealed glass with a working water cycle — suit humidity-lovers like ferns, mosses and nerve plants, and they forgive you for forgetting about them, because inside the glass it rains on schedule. Open terrariums, usually tall vessels with no lid, suit succulents and cacti, but they're really just tiny houseplants in a pretty pot: they want airflow, sparse water and direct sun. My honest advice is to master closed systems first, because they're the reason the hobby is interesting — a sealed jar that stays green for three years without you watering it once is the whole magic trick.
Three skills separate the jar-kit stage from this one, and none of them are expensive. First, layering: you build the jar in functional strata — drainage, charcoal, substrate — instead of dumping soil into glass. Second, plant selection by scale and speed: you pick plants that are small now and stay slow, not seedlings that hit the lid in a month. Third, patience at planting: a freshly built terrarium is a wound, and the first month is about watching for mold, condensation balance and collapse before the moss knits everything together.
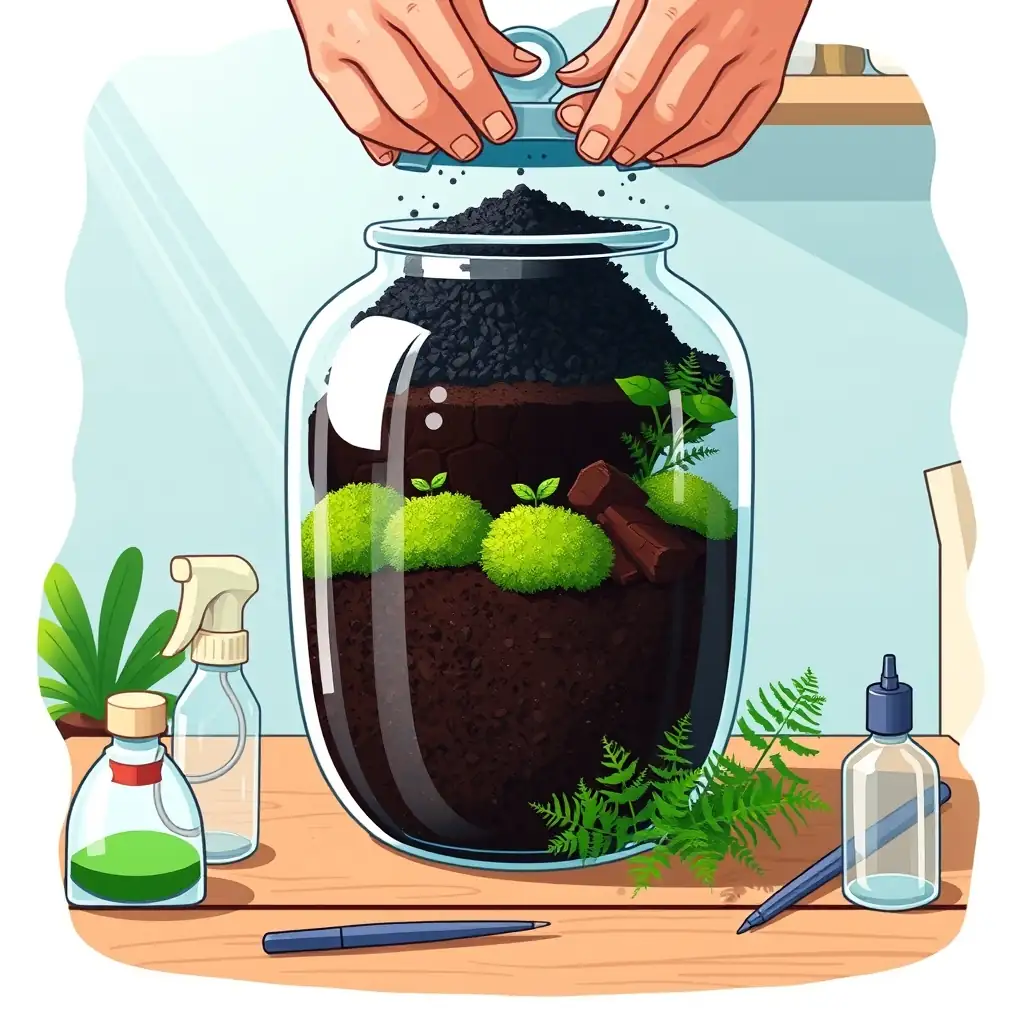
From the bottom up, a well-built closed terrarium is four functional layers. Start with a drainage layer — LECA or coarse gravel, roughly an inch or two depending on vessel height — which gives excess water somewhere to go so roots never sit in it. On top of that goes a thin piece of mesh or window screen, which keeps the substrate from silting down into the drainage layer over the years. Then the layer everybody's heard of: horticultural activated charcoal, a shallow layer that adsorbs the compounds that build up in stale sealed air — it's what keeps a three-year-old jar smelling like forest floor instead of a forgotten lunchbox. Use real horticultural charcoal, never charcoal briquettes, which carry additives you don't want in a sealed system.
The last layer is the substrate, two to three inches of it, and this is where intermediate builders quietly outperform the kit crowd. Regular potting soil is compostable fast inside a sealed jar, so you want a airy mix — a soil-less blend like the classic ABG recipe (tree fern fiber, sphagnum, coco fiber, charcoal, orchid bark andpeats is the hobby's default) or a hand mix of potting soil cut with perlite and orchid bark. Slope it: deeper substrate at the back, thinner at the front glass, so the planting reads like a landscape and the front row doesn't rot against the curve. University extension guides — Oregon State's and Penn State's terrarium pages are both short and excellent — agree on this basic blueprint, which is reassuring, because it means you can't accidentally invent a worse one.
Intermediate plant selection follows two rules: slow, and small. A starter trio of fittonia, pilea and a mini fern is the honest default — all three tolerate the high humidity of a sealed jar, stay in scale for a gallon vessel, and give you a tall, a mid and a ground layer. Cushion moss and sheet moss make the ground cover, and patches of it hide the substrate lines that scream "new jar." Skip succulents in any closed system entirely; they rot in the humidity and they're miserable about it. Skip fast growers too — pothos looks cute as a cutting and becomes a glass prison problem by autumn.
Tools matter more in a jar than they did in the starter kit. A set of long terrarium tweezers and a narrow brush is the difference between placing moss with precision and trying to do surgery through a wine bottle with your fingers. Plant with the tallest in back, one focal point, odd numbers, and negative space — the empty spots are what make it read like a landscape instead of a salad. Water once, lightly, at planting, and then close the lid and start the watch.
Here's the science that makes sealed terrariums the coolest thing in the hobby: the jar runs its own weather. Water evaporates from soil and leaves, condenses on the cool glass, and rains back down — a closed water cycle, which is why a healthy sealed terrarium needs watering only every month or two, sometimes less. Your job is not to water so much as to read the condensation. Light fog on the glass in the morning that clears by midday is a perfect cycle. Constant heavy fog, or water actually running down the glass, means the system is over-wet: open the lid for an hour or two until it settles. No condensation at all in the evening means it's too dry: mist lightly and re-check tomorrow.
The intermediate rule is to start dry and add slowly, because you can always add water to a terrarium but you can't take it out. Every sealed-jar horror story I've heard ends the same way — a generous first watering, then a week of standing water in the drainage layer, then roots gasping in anaerobic mud. Extension guidance is consistent here too: light misting, then watch the glass. Position matters as well: bright indirect light, never direct sun, because a sealed jar in a sunny window is a greenhouse with no door and it will cook everything by early afternoon.
This is the upgrade that separates the tier, and it's living equipment: a springtail culture — tiny, harmless detritivores you dust into the substrate at planting time. Springtails eat mold spores and decaying plant matter before it becomes a problem, and in a sealed jar with no airflow and no escape route, that's the difference between the occasional fuzzy patch and a full white takeover. They're microscopic to nearly invisible, they can't climb smooth glass, and they cost about as much as a coffee. Mold prevention still starts with the basics — sterilized or baked substrate, healthy plants, no buried dead leaves — but the springtails are the insurance policy, and every vivarium builder runs them for the same reason.
Fungus gnats are the other resident you don't want: they ride in on unsterilized soil and breed in wet substrate. Sticky traps barely fit through a jar lid, so prevention beats cure — bake your substrate at low heat first, quarantine new plants for a week, and keep the drainage layer free of standing water. If gnats do show up, letting the surface dry slightly and thinning the top layer usually breaks their cycle without chemicals.
One. Watering generously at planting — the driest-start rule exists because you can add moisture but never subtract it. Two. Sun through a window: the sealed greenhouse effect cooks a jar in an afternoon, so bright and indirect is the only address. Three. Planting succulents in a closed jar, which is the one combination the hobby guarantees will fail. Four. Using charcoal briquettes or unsterilized yard soil, which import additives, pests and mold spores straight into a system with no exit. Five. Forgetting the lid after opening for maintenance — a sealed terrarium left open for days dries out its water cycle and you're back to hand-watering. All five were my mistakes first, so you're welcome.
Intermediate terrarium building is really three hobbies stacked in glass: landscape design, applied weather science, and a little microbiology keeping the peace. The upkeep is genuinely light — a trim when something touches the lid, a mist when the glass stays dry — but the watching is the actual hobby, and the payoff is a sealed world that runs itself on your bookshelf. There's real pride in a jar you layered, planted and seeded with a cleanup crew, opening months later to find the condensation cycling on schedule and the moss gripping like it's always been there. The fermenters here know it, the candle pourers know it, and now you do too. Happy layering.
References

Friendly AI author persona bringing honest, practical hobby advice and clear affiliate disclosures to every guide.